adminMongo - MongoDB GUI
adminMongo: MongoDB GUI
adminMongo is a Web based user interface (GUI) to handle all your MongoDB connections/databases needs. adminMongo is fully responsive and should work on a range of devices.
adminMongo connection information (including username/password) is stored unencrypted in a config file, it is not recommended to run this application on a production or public facing server without proper security considerations.
Installation
- Clone Repository:
git clone https://github.com/mrvautin/adminMongo.git && cd adminMongo - Install dependencies:
npm install - Start application:
npm start - Visit http://127.0.0.1:1234 in your browser
Features
- Manage from a connection level for easy access to multiple databases
- Create/Delete databases
- Create/Delete/Edit collection
- Create/Delete/Edit documents
- Create/Delete indexes
- Query documents
- Collection statistics
- Export collections in JSON format
Limitations
- Documents need to have an "_id" value which is a string, integer, or MongoDB ObjectId. Documents using Composite ID indexing is currently not supported.
Configuration
adminMongo will listen on host: localhost and port: 1234 by default.
This can be overwritten by adding a config file in /config/app.json. The config file can also override the default 5 docs per page.
The config file options are:
    {
        "app": {
            "host": "10.0.0.1",
            "port": 4321,
            "docs_per_page": 15
        }
    }
Note: Any changes to the config file requires a restart of the application
Usage
Create a connection
After visiting http://127.0.0.1:1234 you will be presented with a connection screen. You need to give your connection a unique name as a reference when using adminMongo and a MongoDB formatted connection string. The format of a MongoDB connection string can form: mongodb://<user>:<password>@127.0.0.1:<port>/<db> where specifying to the <db> level is optional. For more information on MongoDB connection strings, see the official MongoDB documentation.
Note: The connection can be either local or remote hosted on VPS or MongoDB service such as MongoLab.
The Connection setup screen
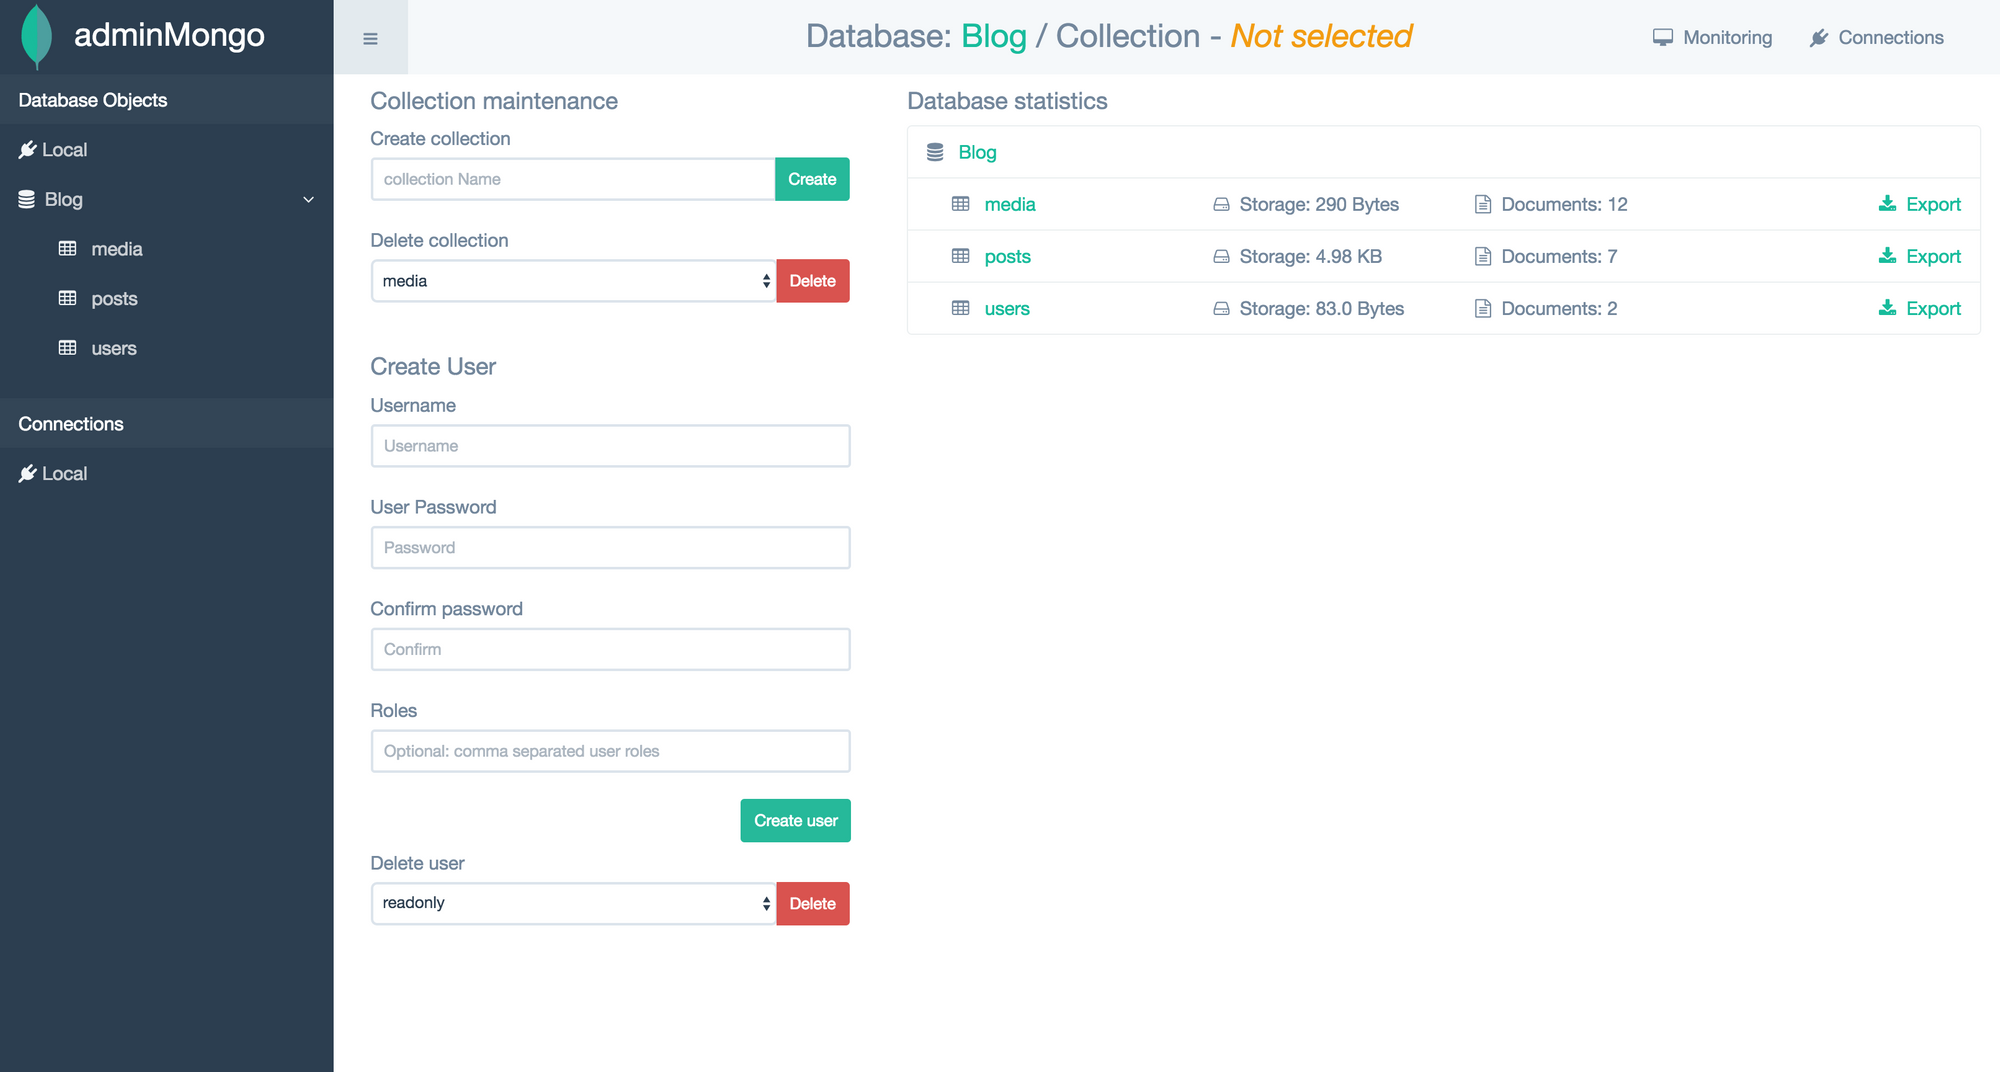
Connection/Database admin
After opening your newly created connection, you are able to see all database objects associated with your connection. Here you can create/delete collections, create/delete users and see various stats for your database.
The connections/database screen
Collections
After selecting your collection from the "Database Objects" menu, you will be presented with the collections screen. Here you can see documents in pagination form, create new documents, search documents, delete, edit documents and view/add indexes to your collection.
The collections screen
Searching documents
You can search documents using the Search documents button on the collections screen. You will need to enter the key (field name) and value. Eg: key = "_id" and value = "569ff81e0077663d78a114ce".
You can clear your search by clicking the Reset button on the collections screen.
The collections screen
Documents
Adding and editing documents is done using a JSON syntax highlighting control.
Editing a document
Indexes
Indexes can be added from the collection screen. Please see the official MongoDB documentation on adding indexes.
Contributing
- Fork it!
- Create your feature branch:
git checkout -b my-new-feature - Commit your changes:
git commit -am 'Add some feature' - Push to the branch:
git push origin my-new-feature - Submit a pull request :D